PURPLE SHAMPOO INSTRUCTIONS!

LIFE IS HARD OUT HERE FOR A BLONDE

So. I have been noticing over the last few months that I have not adequately been giving a thorough “how-to” when it comes to the use of purple shampoo either in person or on any of our social media platforms.  (Very 2020 of me. Sorry! 😐

ATTENTION: These instructions apply to all of you using a DARK purple shampoo. I’m talking one that stains your hands and shower/tub purple if there are white tiles or the tub is white. Or if there is while caulking between any color of tiles lol.  The kind that gets your hair nice and white-ish-grey-ish-silver-ish. (Today, that is a word.)


PRO TIP:  Purple shampoo DOES NOT replace your regular shampoo. It works more like a toner of sorts….a tool to beat brassiness and yellowness, not to necessarily clean your hair. This means:

HOW-TO TIP:  Use your purple shampoo in correlation with your regular moisturizing shampoo, in this order:

1. Wash hair with regular shampoo once or twice, depending on how dirty
it is.

2.  Then “wash” your hair with the purple shampoo, making sure it is evenly
distributed throughout your hair…(it will stain an area violet if you glob
it on in one spot before rubbing it around).

        -Note! Make sure your hair has a good amount of water in it before
        application of the purple shampoo will help it spread evenly 🙂

3.  If there is a certain area that is more yellow or brassy, then just use the purple shampoo on that area.  I suggest getting out of the shower and using the mirror to help see you’re putting in on the right spot.

4.  Leave it on for up to 10-15 minutes depending on how dark you want
the violet to soak into your hair.

5.  Rinse thoroughly- until the water is pretty clear of any violet, and then
use a really good hydrating conditioner.

Please don’t hesitate to ask any questions on the comment area of this posting in case I have forgotten something or you have additional questions about info I have already given!

XOXOX

Caitlin

My personal favorites. Emme Diciotto and Lanza’s silver shampoos.

Tagged , , ,

HOW SOCIAL MEDIA CREATES BLONDE HAIR COLOR DISASTERS 😭

Welp.

I’m sure you all can guess a lot of the points that I’m going to make in this post.

However, if you can’t, or can, it’s still good to hear it from the mouth from a professional.

Instagram. It all starts here because Facebook, Pinterest, and Twitter all have mostly shared posts and videos. Okay, YouTube too… but I think we are all mostly getting fascinating ideas without seeing the processes it takes due to editing of videos (because who would watch a 12 hour correction) and still images. (I’m looking at you, “before and afters”.)

First off, I think we should all remember that maybe only about 1% of before and afters get shown to us because the other 99% are NOT posted. It’s not that hair colorists don’t want to show them to help their audience understand it’s not all rainbows and sheets of platinum healthy hair as the result- but more so the fact that we are posting work to get LIKES. Even the most educational, realistic, and difficult jobs that we would like to share to help our clients understand will NOT be simply because Instagram is a tool for our business. To attract followers and likes. Add to that the constant change of algorithm; we are posting what we think will be liked the quickest, pull in others to our page and get a follow, or to get a share or a bookmark.

Everyone’s hair is vastly different and has a separate history and biological response to each and every hair service.

This includes not just the bleach- but the hair color remover, the pre-treatments, the technique in which all lightener is applied, and the toners or any pigment put back in. Especially especially the toners or pigments put back in.

Really there is NO way to know how anyone’s hair is going to react to a color service. Even a regular clients hair can go AWOL some times and do some weird shit.

When you learn about hair coloring, the class is called THEORY. We all remember what a theory is, right? It’s an educated guess of an outcome. A GUESS.

This is why when we do get that exact color the clients wanted, we are all: “LOOK AT THIS BEFORE AND AFTER I AM RULING THE HAIR GAME! 👑🥳🙌🏼!”

Hair is photographed in different lighting. The best possible lighting. This included studio lighting, bouncers, strobe flash bulbs, ring lights and perfect daylight.

Although daylight is by far the best lighting, it is not always available. We try desperately to recreate it when it is not possible, however this ends up still not giving you a straight up idea of what it will look like in your office, bathroom, rearview mirror with your sunroof open, etc. (If I could have 5$ for every pic sent by a client of their hair in the bathroom of a restaurant or even at their house then I probably would only cruise into work a couple times a week since I’d be a millionaire lol the salon would be a passion project, second to my ranch of older dogs and other various animals I’d rescue with all my heaps of 5$ bills LOL.)

Yes. Your blonde hair will look different in EVERY LIGHT. It will not always look like your after pic at the salon or the selfie on a cloudy day at the beach. Or when you were super tan after Coachella last year. These pictures create havoc in your mind because if you look at them and then your current hair- it will never match! I mean- if I did it- then it should always look fucking amazing lol but it still varies- constantly!

This is just the start of unsteady expectations. We haven’t even gotten to editing or FaceTune-ing yet.

Now if you are comparing your results or if before the appt, comparing what you DO want to other’s hair that isn’t even YOU- then you have started another whole situation lol. Now we are talking about someone else’s hair completely. And almost 70% of the time, the hair is 100%-200% thicker, and almost never the same length.

If you are one of my clients that brings in a pic of someone who has the same type and natural color of hair like you do, and the same length and thickness- then you know who you are! I probably got very excited, told you that you were client of the month (or year!) and made a huge deal about how you conquered the inspo pic game!!!

A inspo pic that is way way off from your hairs length, type, and thickness is the start to unrealistic expectations. It’s not that we can’t get your hair that exact color- but it’s going to LOOK different when it’s done!

DISCLAIMER:

🤷🏼‍♀️ now that I’m going on and on about this, I should probably also mention that a lot of you are amazing and have Insta pics simply for inspiration. Some of you even bring in multiple images and let us find the common denominator and give you that look! For all of you who do this, we love you we appreciate you and there may have been some talk about going ring shopping even lol! 💍👩‍❤️‍💋‍👩

HOW FLAT IRONS TURN YOUR HIGHLIGHTS ORANGE AND OTHER THINGS PURPLE SHAMPOO WON’T FIX :-/

IMG_4371

SO MANY TIMES I answer a client’s or follower’s question with a factual explanation and as soon as it comes out of my mouth I think: This is something I should actually let everyone know.

It happened today.

I was doing an email consult- we were on about the 17th email and I had asked for pics of the future clients hair and a brief history of any chemical services. One of the images showed the bottoms of her hair and underneath she said, “I don’t know why but after the damage, my ends that were over processed and super blonde ended up shorter and thin, and went super brassy!”

My immediate thought was, “well yes… because the light blonde broke off and you have the lowlights/hair between highlights left, and then the blonde that was only lifted one time”! I had already asked at first if she used hot tools and she said not all the time but she HAD to flat iron sometimes because the ends were so crunchy that they couldn’t be smoothed any other way.

FIRST.

When the blonde breaks off- what is left? The hair between the highlights. And the hair that was only lifted once and then the highlights were rinsed because the overlapping of bleach was going to break off the ends which were somewhat blonde before but NOW were white blonde. (Of course they didn’t break THEN. But they will and did later on.)

We all know that flat irons and other tools that get super hot break your hair. But what we don’t realize is that after that hair breaks off what’s left is darker hair that wasn’t lifted up as high!

SECOND.

Any hair that has been lifted up to a blonde and then toned down to get rid of the brassiness in the salon is not only a darker shade of yellow, but when you use hot tools it literally “cooks” the hair! Everyone knows with the crust of bread looks like right? When things get heated up, it “toasts” the thing that is getting hot. 

The best way to make sure this doesn’t happen is to make sure that your hair is safely lifted in the first place. However adding heat to what’s left, makes darker hair lighter (orangey) by taking out all the pigment of a toner or any natural pigment.*

*When hair is lifted with color, it is first lifted with the ammonia product in the color and then the pigment is deposited over the lifted hair which is never a light neutral blonde or light brown for that matter. Also the flat iron can oxidize your natural hair faster- it’s like how the ends of virgin hair are always lighter than the new growth. The ends have been exposed to sun and environment and air, but hot tools speed up that process in a harsher way.

And let me tell you— purple shampoo is NOT going to help any hair that isn’t already on the lighter side of blonde. It certainly isn’t going to help the leftover brassy natural hair or darker blonde that wasn’t lifted enough!

Stuff like this is common knowledge to A Blonde Specialist! And it takes a while to explain, so I find myself telling clients who it pertains to- but realize this is a problem I see a lot and I figured I should at least give you guys a heads up!

Basically—- find a colorist who will not overlap the lightener using the same strength of product from roots to ends.

I wish I had better advice or solution but also remember that fixing your crunchy ends with a flat iron is not going to do anything good for your hair in the long run. 😭😭😭😭

OTHER STUFF THAT PURPLE SHAMPOO WILL NOT FIX:

– Hair that has lighter and darker areas of blonde- it will only showcase the yellow or orange by placing a violet hue on the light blonde next to it. (Including too light of a base color or base break/bump that has gone orange with the lighter blonde highlights in between it!)

– The top orange parts of a balayage in a lived-in look. If the top of the balayage was not lifted high enough and then toned down to create the depth and the darkness of a shadow root, the purple shampoo will not cover up the orange

– Hot roots in general. (When your hair by your scalp is kind of glowing brassiness from a too-light base color that won’t hold toner, or that toner can’t fix.

– The leftover “temporary dye” or pigmented conditioner (I’m looking at you, Overtone) in any color besides a very light yellow.

– Your relationship with your sister-in-law after you may or may not have told her what you thought of her parenting over your last family zoom meeting… LOL

THAT BEING SAID.

Ya’ll know I would drink purple shampoo for breakfast if I could.

When you ask how often to use purple shampoo I’m like– um. Every day?

Purple shampoo is the amazing at home tool you can use to keep your blondeness as icy a humanly possible and I am a HUGE FAN of its benefits!!!

I hope this wasn’t too much of a Debbie downer!!!!

Just wanted to share a regular thought/answer I always think of as common knowledge but DUH you guys aren’t hair colorists!!!! It’s literally my job to let you know what’s up!!!!!!

XOXO

CAITLIN ❤️❤️❤️❤️

SCALP DETOX 101

Hey All!!!
I recently did an interview for The ZOE REPORT and realized its basically a how-to so I am adding it to the blog!
XOXO CAITLIN
1. How important is “scalp detox” for healthy hair? (I.e. removing “the build-up of products, pollution, sebum and dead skin cells” with scalp masks & scrubs)
Scalp detox is something that isn’t spoken about regularly, such as, say, clarifying treatments of the actual hair. Buy scalp detox is as if not more important because this is where you hair grows from! In order to have healthy strong hair, you want to make sure it is coming from a scalp free of build ups (ew but true) that is clean healthy and ph balanced. Compare it to exfoliation of your face. How dull and clogged can your skin get on your face without exfoliation? Ever get a facial and look in the mirror and exclaim ‘WOW i should have done this a LONG time ago? Your hair will say this to you after a scalp detox!
2. How do you recommend women “detox” their scalps? How often should this treatment be performed?
Personally, I have tried a few methods, and it really depends on your personality. Do you like having a system laid out in front of you in well designed packaging with instructions and steps? Do you like a one shot woo-hoo get this show on the road I have 5 extra minutes in the shower and thats it? Do you like to go to your kitchen pantry and get out all the raw and organic ingredients because nature gives you what you need for any beauty ritual or treatment of ailments? I consider once a month to be sufficient for a woman who washes her hair 2.5 times a week on average, works out about 3 times a week, that uses either a heavyish conditioner or some type of styling product.
3. What are some of the benefits of regular “scalp detox?” Are there any risks?
Benefits are great because you immediately see and feel them! What’s better than instant gratification? Your hair will feel bouncier after and your scalp with feel CLEAN like you know the clean when you leave after a color appointment? Thats because the chemicals from the color kind of exfoliate your scalp. Notice how the blow dry is ALWAYS better than your own attempt? Part of this is because your scalp got super extra clean. Also your hair will most likely grow thicker and fuller when the build up is off your hair follicles and oils are not in the way of healthy hair growth.
The risks would be for anyone who has a scalp condition such as psoriasis, seborrheic dermatitis (dandruff) or any other scalp condition that would cause any breakage or thinning of the skin on your scalp or tenderness in general. 

natural-hairstyles-1

I bet this random lady I found on google detoxes her scalp. Just look at her flowing hair. Thats what I googled: “flowing hair”.

4. Favorite products to recommend in this category + why?
Yay hair products!! All the things you didn’t even know you NEEDED!
1) Davines Detoxifying Superactive shampoo and Detoxifying Mud. This twostep treatment is beautifully packaged and ready to give the type A customer exactly what they want. With a formula that includes clay from the spa are of Acqui Terme in Italy, they ensure this will remove any dust and smog particles that have settles onto your scalp. This also removes the surface squamous layer on your scalp which is not an easy task. (Also EW.)

2) Bumble & Bumble Scalp Detox. Quick and to the point! This fizzing foam that they say themselves is “like pop rocks on your scalp” uses micellar water and salicylic acid to remove debris and overloaded styling products. Use before shampooing in the shower, you only need to leave it on for 3 minutes!

N310-26_D093__03

I bet this random lady I found on the internet does NOT detox her scalp. And now she has to borrow a fake pony from her blonde sister. Who has always been more popular and smart.

3) Get your self to the kitchen, natural mamma! Or papa! Get some Himalayan pink salt, some raw apple cider vinegar, some coconut or olive oil, and some honey. Mix in a container (table spoon of everything besides the salon which would be about 1/4 cup), and apply on freshly washed wet hair. Massage away and let sit for 10-15 min. Do some deep breathing and picture all impurities dropping from your scalp, and rinse.
4) Recently, I found out of R+Co’s Acid Wash which is technically a clarifying shampoo but has properties that will also cleanse the scalp extra!
5) Good Ol’ Fashioned Malibu Packets! You know we love that shit over here!!!!
8581 Santa Monica Blvd #305, West Hollywood, CA 90069

Help Me, I’m Porous!!!

signs-that-youre-not-really-poor-youre-just-rich--2-30908-1496077613-2_dblbig

Our hero, Mrs. Iglesias

UH OHHHHH… Fried hair, who dis?


Welp. It happened. Lets skip past the part of fault or blame, reign in your threats or self-loathing thoughts.  Your hair is trashed or broken whether you asked for it or not. Fast-forward to FIX. 

How POROUS hair is the same as DAMAGED hair


Basically, porous hair has a blown out cuticle and most of the keratin (naturally occurring protein) gone. This can be from bleach, color, heat, chemicals of other kinds, or environmental crap (smog, UV, even dry weather and wind can affect it).

Porous hair is frizzy, stretchy or cottony when wet and tangles like no other.  Hard to brush through, and even harder to straighten and smooth, it has most of us grabbing for a hot tool to make it look presentable!  AUGH!! UNHAND THE FLAT IRON!!!

Being an all things blonde blog and lifestyle (if you ask me the blonde life chose ME), we understand that bleach is most likely a part of your life, and will be for a long time to come.  So lets see how we can repair porous hair in a fun DIY way— or for those overachievers, prevent it from happening.


Is my hair porous?

A quiz by Caitlin Richardson

  1. Do you have blonde hair
  2. Do you have you hair colored or bleached at all
  3. Do you live in LA
  4. Do you work out and sweat
  5. Do you spend a good amount of time in the sun?
  6. Do you like to drink Santa Margharita by tha’ LITA’?

If you answered yes to ANY of these questions that answer is YES.

If you answered YES to number 3 then you probably answered YES to all of the other questions too LOL.


Today I am NOT going to recommend a product.

We all have enough junk at home don’t get me started about throwing away product over a year old. (Yes thats a real thing.) I’m going to just recommend you go into the kitchen and grab some stuff and use home remedies for this! Its more fun and JUST as effective! Time to get your hands dirty, kids!


MESSY ASS TREATMENT #1

scrambledeggsbowl052017

What you’ll need:

EGGS. Bowl. Wisk.

-Beat eggs (2-3 depending on how long your hair is)

-Apply to freshly washed, towel dried hair

-Leave on for 30 min or however long you can stand smelling like breakfast

-Rinse with COLD or COOL water or else the egg will cook in your hair I swear to god.

-You can wash the egg out or just rinse for a long time and condition, comb through, and rinse well again


MESSY ASS TREATMENT #2


What you’ll need:

71v6iaVXK3L._SL1500_Keratin shampoo and conditioner, (we love It’s a 10 Miracle Shampoo Plus Keratin and also the matching deep conditioner). Apple cider vinegar (we love Bragg’s). Coconut oil (Dr. Bronner’s). Wet Brush™.

-Wash yer hair with the keratin shampoo and rinse then wring out

-Get a half cup or so of the apple cider vinegar and pour over you hair. Don’t dump it like you’re getting slimed on Nickelodeon, but try and pour it evenly over around the top and sides of your head so it runs down covering all of the areas of your hair

-Take the Wet Brush™ (or a large comb) and comb the vinegar through your hair

-Go to the kitchen, get a square of aluminum foil, bring back to the bathroom and take out a half teaspoon of the coconut oil and put it on the foil

-Check Instagram. Go to @blonde.blond and follow if you don’t already. Like all of the pics are far back as it will let you in 10 minutes. Or do something else that takes 10 minutes I’m sure you could get lost in @overheardla that shit is hilarious

After the apple cider vinegar has been sitting on your hair for 10 minutes you can get back in the shower and rinse it out with LUKEWARM water 🙂

-Condition with the keratin conditioner, comb through with the brush or comb and shave your legs or something else that takes 5 minutes. Read your daily horoscope? Definitely read your ex’s horoscope.

-Rinse out conditioner! Then blot dry and take the coconut oil and rub vigorously between your hands to warm it up and rake it through your hair from the mid-shaft down through your ends (use less than half a teaspoon is your hair is shoulder length or shorter

-Air dry or better go to sleep and wash out any excess coconut oil in the morning


MESSY ASS TREATMENT #3

photo-113

What you’ll need:

VERY ripe banana. 1 tbsp olive oil. 1 tbsp raw honey. Blender or bowl and disposable gloves.

-Mix/mash everything together in a bowl! Pro tip: If you wear disposable gloves and do it by hand its much more fun, but you can use a blender if you want (hella basic) 1

-Wash your hair and use this as a deep conditioner, leave on for 10-15 minutes, it’s best to get out of the shower and apply using the mirror make sure you’re getting it all over evenly

-Rinse really well and if you want to lessen the smell go ahead and condition again with your regular conditioner


I personally like getting my hands dirty and doing messy projects around the house so I hope you guys enjoy it as well!


I mean, Olaplaex works, so does Urban Moisture by Shu Uemura and Fluffy Feel by Milbon, but those are things to use with every wash! Bonus points if you do this with wet toenails and fluffy slippers on ❤ ❤ ❤


Love From Your Personal Chef, 

Caitlin 


8581 Santa Monica Blvd #305, West Hollywood, CA 90069


How Instagram is Creating Hair Disasters

What could possibly create the perfect hair disaster?

UNREALISTIC EXPECTATIONS.

Where do you get unrealistic expectations?

INSTAGRAM.

If anyone thought that body image was destroyed due to super models and airbrushing, then they hadn’t had a second to delve into hair color with filters on them.

Its not that your colorist isn’t talented and able; it’s that every single thing you’ve done to your hair is affecting how and if you can get that color you saw on that bloggers post. 

“That color you saw on that bloggers post”

We WISH we could get you that white ended bleachy balayage! In fact, we will get you within one shade! But GIRL you dyed your hair pink and purple for Coachella and it god knows why faded to orange but thats actually a thing! We aint sayin’ it won’t get white but we definitely can’t say it will. 

Disaster happens when you don’t fully detail your hair’s history to your colorist and don’t have a realistic idea of what shade of blonde your hair can safely be lifted to.  Here’s some information and tips to help you stray from any perceived disaster!


Unknown

LOVE everything about this hair but extensions are most likely a factor

Here’s a list of things to keep in mind when trying to get that perfect blonde you’ve seen all over the IG:

  1. Do you have old hair color of ANY kind on you hair? (Even if its faded?)
  2. Does the picture show a person with much more hair than you? (It’s probably extensions)
  3. Is your natural hair color a super dark brown? (Some natural dark brown and black hair colors can lift to white no problem, some can’t!)
  4. Does the picture you’re using as inspo have a lot of filters and/or photoshopping/facetuning done on it? (It can be hard to tell if it does or not- ask your colorist their opinion!)
  5. Lastly, have you considered how the actual tone of hair would look with YOUR complexion and shape of face or eye color? (Sometimes even the body on a hair model can be what we are wishing for- not the hair itself!)


Here’s a list of things you can do to help yourself and your colorist get on track to getting the blonde of your dreams onto your pretty little head:

  1. Be super super clear and honest about past hair treatments/color! (That toner 6 years ago? TELL THEM! The “wash out” keratin treatment 2 years ago? Also important!)
  2. Look at the amount and volume of hair you have… Are your ends thin? Is your hair thinner up top near your scalp and thicker towards the bottom? (Be realistic and know that no matter what theres always a trick to “fix” whatever trait is opposite of what you want! Dont be embarrassed- your colorist is here to help. If you feel belittled or ignored, see the post about when its time to change haircolorists.) AND don’t forget! Extensions are a girls best friend! Whether clip ins or permanent 🙂
  3. IF your hair is super dark naturally, don’t just assume that if you want white blonde it’s the only blonde you would love. You’d be surprised at the amount of clients that actually want their hair toned down after achieving the super “white blonde” we are speaking of! (Take the time to look through many shades of blonde hair on models/people that have your complexion and eye color and also eyebrow color– there’s more than one shade that can be considered “perfect”!)

    images

    Maybe not her real hair LOL

  4. Save the pictures you love- but make sure to ALSO ask your colorist (or a photographer friend if you have one) how many filters and photoshopping/lighting tricks were used to create the final look!
  5. Color swatches and wigs!!! If you don’t know what you’d look like with a certain tone of hair— play around with the shade next to your face! We even use extension swatches, because they’re usually longer pieces of hair, to show clients what they’d look like with certain colors next to their skin. (Always ask colorists to show you a swatch of the hair color you are discussing, but please note if they are using color swatches from hair dye books, it may not be a large enough swatch to show you exactly what it would look like overall.)


Lastly, it doesn’t HURT to collect images of your dream hair!

Just make sure to also screenshot some that are a little varied from your dream hair! The more inspo pics the BETTER!!!


❤ and ALL things BLONDE!!!

Caitlin xo


Extensions for Blonde Hair: HOW TO

IMG_2063

You can’t always get what you want? Ummm… Ya I do.

What could possibly be better than instant gratification? Nothing.  Your hair is blonde, so your pretty much get what you want when you want it, BUT now you want MORE blonde hair.  NOW.

Voilá! Hair extensions. 

Unfortunately, this isn’t a wave your wand type of demand.  Once again, having blonde hair is going to make this something you again have to research and carefully make the right decision about.  Boring but necessary, ladies and gents!

Im going to try and outline the most important factors in the easiest way, but remember there are SO many exceptions I’ll probably only cover about %80 of cases.

Types of Hair Extensions


Clip-Ins

The most sorority friendly extensions out there, these are able to be used with great variation out of all the extension types.  Add to that you take them out at the end of the day, and you have yourself some super easy blonde hair! (Not to be confused with your super easy friend Jessica, who also wears clip-ins.)

IMG_0607-500x500

PROS:

  • You can use as little or as many clips ins as you want!  Add one for a thicker bun/top knot, or add 10 wefts when you want to look better than the actual bride.
  • You can have different lengths and colors and use them appropriately to match whatever stage your grow out is at or whatever color your ends are at the time.
  • You can take them out at the ends of the night
  • You can remove them at any time for a color or chemical service or treatment


CONS:

  • They require some skill to put in if you don’t want to look drunk when you show up.
  • Any swimming in clip-ins is not advised.
  • You can’t sleep in them!  No; not even just for 3 hours before you have to get up and sneak out of your exes place before his/her roommate wakes up.
  • You usually cannot change your hairstyle mid-use without re-placing them on different part of your head; as in from low bun to high bun, all down to half up, etc.
  • Once you cut them, you need to remember exactly where they go, down to the inch, if you want them to fall into place with the rest of the set that was cut.


Difficulties with Clip-Ins:

So one of the times clip-ins can prove to be a bitch are when your hair has really short layers in it, or is really short all around.  Add to that, or by itself, THICK hair can be pretty hard to use clip ins with because any new layer of hair will look out of place.  For this, you would want to have some clip-in wefts custom made with twice the amount of hair in each piece, or if you can sew, you can double up ones you bought yourself.  I would explain how to do this but I don’t want Girl Scouts of America to go out of business because Samoas.

Tape-Ins

Tape-ins are the best friend of any hairstylist.  Easy to install, move up, and remove, these babies are the epitome of instant gratification.  If your stylist is good at their job, you can have a drastic transformation in as little as one hour.

clean-tape-in-hair-extension-weft

PROS:

  • Fast to put in and move up
  • Best extension option for adding thickness without requiring many pieces
  • Less expensive to install and move up.
  • Can be used over freshly beached hair. God I love that term…”freshly bleached.”

CONS:

  • You need to move these up every 5-6 weeks.
  • You can only use the same hair 3 times.
  • You have to be careful when putting your hair up, pulling these in the wrong direction can be damaging.
  • You have to plan your color services around their move-ups.
  • You can’t buy single tape-ins from the good suppliers, so if you need long ones and then short one for layers, you have to pay for the long ones then cut off the length which is painful, so painful…

the-tape-hair-extensions

Difficulties with tape-ins:

Tape-ins pose to be a problem if you work out a lot or have excessively oily hair.  I guess moisture is the culprit here.  Also if you’re in the middle of repairing some damaged hair and need weekly or twice weekly treatments, these things can break down the tops of the tape-ins and hair will shed out faster, or only be able to be used 2 times instead of 3.  Another thing with tape-ins is that its hard to have anything but a top knot or low ponytail.  Half-up and half-down is almost always out of the question, boohoo all y’all hipsters!  I guess the other thing that is difficult with tape-ins is that if you’re purple shampooing your hair, the tape-ins grab the purple pigment way quicker than your regular hair.  I dunno- if Brittany would ever balayage my hair maybe my ends would be as porous as my tape-ins and this wouldn’t be an issue. BRITTANY.

Beads 

There are two ways to have bead extensions, individual and weft.  I will break these up in two parts, but remember, weft extensions put in with beads were meant for DAY use only, maximum one week.  If your hair can handle wefts put in with beads longer than this, hell yes I am super happy for you, but if you are a regular human person with regular person hair, don’t risk this!

cache_4100285845.jpg

INDIVIDUAL BEAD PROS:

  • If you have strong hair, these can last you up to 12 weeks between move-ups.
  • You can buy many different shades and lengths to be installed at the same time.
  • If you swim a lot or work out every day, these are fantastic for that lifestyle.
  • You can reuse the hair until you don’t want to anymore or until your hair grows past their length!


INDIVIDUAL BEAD CONS:

  • Definitely not recommended for using over freshly bleached hair.
  • It takes a good 4+ hours to install a full head of these, up to 6 hours, and just as long to do the move-ups
  • These cost more for installation and move-up and removal due to the labor involved.
  • Did I mention you have to sit for 4+ hours? And thats on top of however long you have to sit for color.

Factory-Price-Brazilian-Remy-Hair-Micro-Bead-Hair-Weft-Extensions-Micro-Ring-Link-Sewing-in-Weave

TRACKS IN WITH BEADS PROS:

  • These can be put in super fast and add A LOT of hair at the same time.
  • Fantastic for a day or two long photo shoot (maximum one week I allow my clients to have these in, and thats put in properly by a professional).
  • Great short term alternative to sew-ins.


TRACKS WITH BEADS CONS:

  • These put a lot of weight onto a small amount of natural hair, a lot of pulling or tugging will result on breakage in a lot of cases.
  • You get the amount of hair you’d get with clip-ins, but you can’t do them yourself.
  • You have to take out your gorgeous mane of hair so soon, but if you own the tracks, these can have clips sewn onto them and you can make clip-ins!


Difficulties with Individual Bead Extensions: 

You have to be careful with these because I’ve noticed if you travel a lot for some reason these can start to wear and tear on your hair… I don’t know if its because the beads are metal or what, but excessive flying has affected some of my clients hair when they have bead extensions.  I like to blame EMF’s but in all truthfulness I’m not even sure what electromagnetic fields do or how they would react to copper or aluminum but it seems fishy, right?!  Also if you don’t have the right person “doing” them, they have a tendency to slip out.  Thought it is expected and normal to lose 12-14 in the week or two following an installation, it’s still funny to have a “noodle” slip out of your hair at dinner.  Extra points if you have super light blonde hair because then it looks like a piece of cooked spaghetti :-0 LOL.  (One time I found a noodle on my doormat in the morning so I know I had a really good night the night before, even if I couldn’t remember exactly what happened.)


Fused/Glue

Its not 2003 so I refuse to even speak about this.  Sorry GreatLengths™.

the-simple-life-taught-me-work-ethic-body-image-1458238426

(No shit talking Paris and Nicole, I fucking LOVE them.  Where is this person that gave them a show?  I want to give them a medal.)

Sew-Ins

Ah the old classic sew-in weft extensions!  Also known as “weaves”.  This is for my black or mixed girls out there, or truly anyone with thick-ass hair that will stay in a tight braid in which to sew wefts of hair to.  Haitians and Jamaicans, other islander girls.  You know who you are.  I’ve even had a few white girls that had a good stylist that was able to work magic on her hair and keep wefts in tight for 2-3 months at a time.  I do not have a lot of experience here with this type of extension so I am going to refer to my assistant Brandi for our pros and cons!


SEW-INS PROS: (By Brandi!)

  •  With sewn in extensions you can add highlights and experiment with different hair colors without making a permanent decision.
  • You can instantly add length and volume without waiting months and years for your hair to grow.

  • Sewn extensions are nice and snug so you wont have to worry about your extension slipping out.  

  • Some extension styles can hide the majority of your hair protecting it from damage and exposure to the elements. These type of extensions prevent constant manipulation like combing and heat styling and help with hair retention.

SEW-INS CONS: (By Brandi!)

  • Sewn in extensions can take time getting used to. They are attached to a braid on your natural hair and can sometimes be uncomfortable and cause headaches but this will go away in a few days.

  • If the extensions are not put in correctly or applied too tight they may cause breakage or traction alopecia.

  • If they are not properly taken care of or washed regularly they can cause bacteria build-up and tangling.

  • They are low maintenance but not no maintenance you must take care of your hair when wearing sewn in extensions.

     –Thanks Brandi!-

Well, there are some other types of extensions I did not cover in this post.  Some ones I can think about off-hand are shrinkies, which is similar to bead extensions, except the bead it self is plastic and shrinks with heat around the extension tip and natural hair root.  Another is the halo, which is multiple tracks of hair layered onto one weft and hung with a fishing line around your head, hidden by your own hair.  If anyone has inquiries about other types let me know and I will research them and do a follow up post!

XOXO 

WITH LOVE AND THICK MANES OF BLONDE EXTENSIONS FOR ALL!

Caitlin ❤


8581 Santa Monica Blvd #305, West Hollywood, CA 90069

Breaking Your Bad Ponytail Habit!

Whats up Blondies! 

If you all are anything like me, you have a serious habit of throwing your hair up throughout the day– or all day.

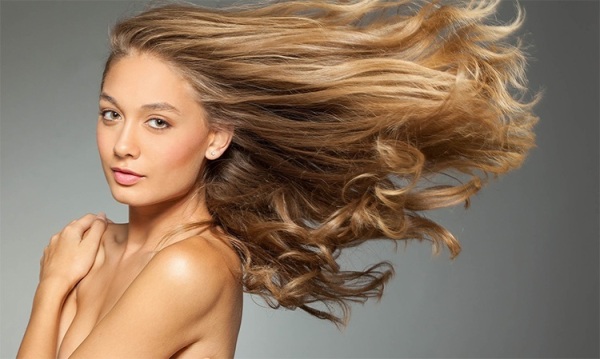
Of course it looks cute!  What’s better than that casual “I woke up like this” hair-do?  After all, we’ve put enough effort into the botox, fillers, spray tans, Sunday Riley skincare, etc.  This woman does NOT need to have my hair done every day.

The problem with constantly putting your blonde AF hair up is that there are some serious consequences if you are not doing it safely!  Let me give you the most important examples and then tell you the solutions!


First Problem:

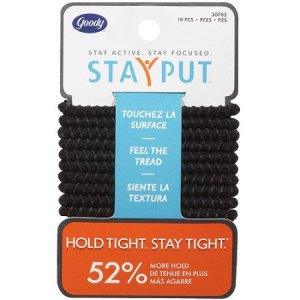
What you’re tying your hair up with.  I personally really like the shade of red that whole foods wraps their to go containers from the deli with.  However using said tie to put my hair up in a top knot is no bueno!  And i know you know this… but some of those elastic made-for-hair-ties are almost as bad.  Think the ties that are meant for exercising: non-slip, sweat-proof, etc.  The silicone sticky part that grips your hair also RIPS your hair.

Throw that shit out, yo!  Below is NOT a friend of blondes.
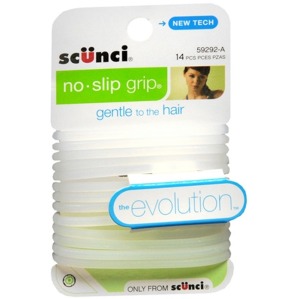
2cbd09f0-5140-45af-9385-5d6a0337d75a_1-b1fe629429c1212d33ba8f88532a52cdscunci2-whiteb


First Solution:


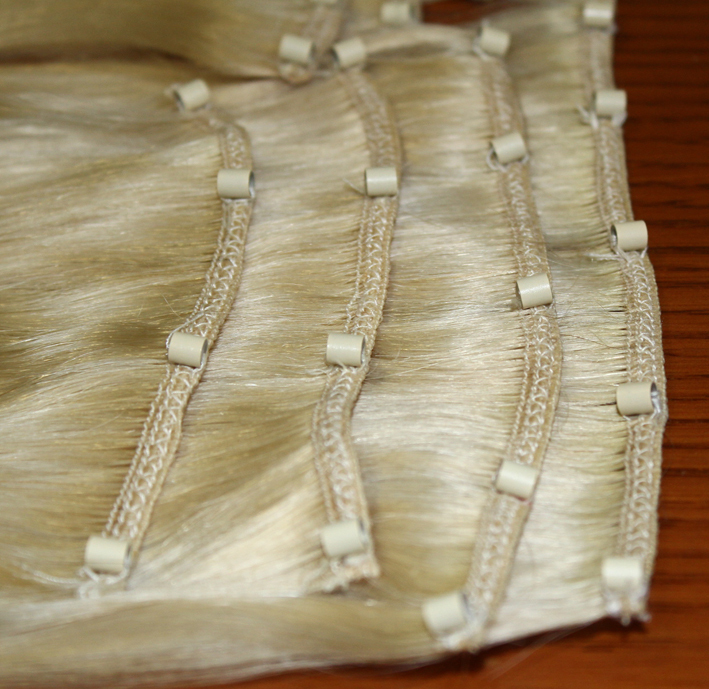
Try these lovely blonde hued pony-holders instead!  **Will they keep your hair as tight and pulled against your head??  Hell no, of course they won’t!  (But this I will explain in the next problem/solution.)

* secret tip for a tight pony using these holders: do a half up pony first, then a second at the base on your neck, incorporating the bottom of the top pony

Sephora is a good go-to for both of these helpful holders, (of course).

images-1         unknown-1

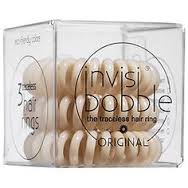
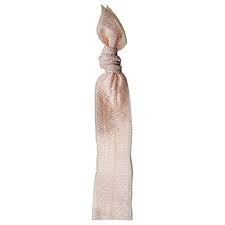
I call them the phone cord tie and the knotted ribbon elastic tie.  Apparently I’m not that creative when it comes to naming ponytail holders…. -_-


Second Problem:

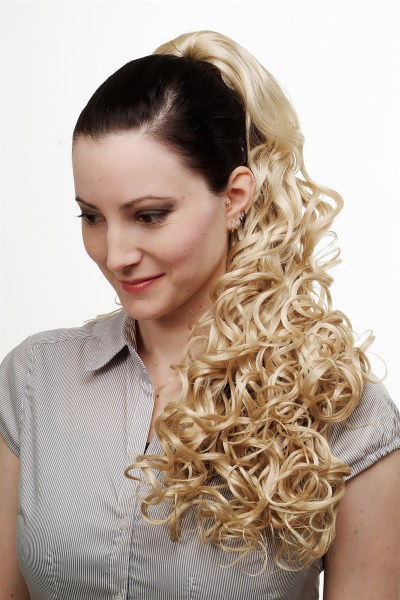
Anchoring your ponytail/top-knot/bun.

“Anchoring” refers to the center of your ponytail or bun, underneath the tie you’re using, that is the part of your hair that has the tightest hold on it to keep your ponytail or bun centered and help tight against your head.

“Anchors” are blonde kryptonite!  The constant pulling in the same spot, followed by slippage of the tie, (only pulling on the anchoring area to try and fight gravity), then followed by re-putting-up the pony?  It wears down your hair over time, and if you live in LA, then you end up seeing breakage quickly.  Your hair may lay weird, your cowlick may separate more and make you subconscious about your roots in the back… You may feel like the back of your head is flat.


Second Solution:

Move that bun or ponytail AROUND! 

This is pretty self explanatory.  I personally try to keep my ponytail or bun different for different activities.  At home, I wear it at the base of my neck, when running I do the middle of the back of my head, and at work I do a top-knot.  However, half the time I’m at work I do the base of my neck because let’s face it I work a LOT more than I run or workout LOL.


***Also another thing to think about***

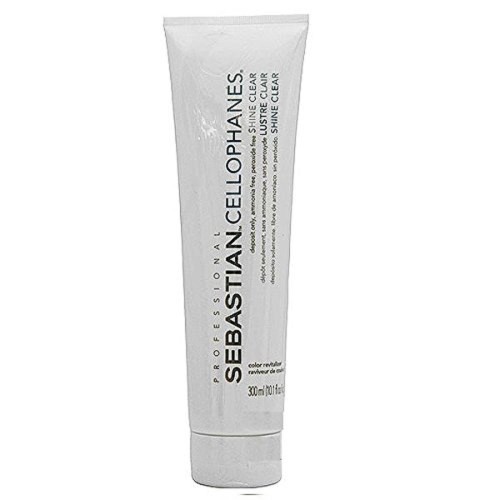
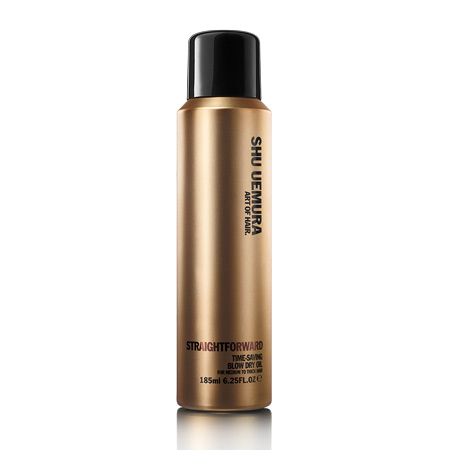
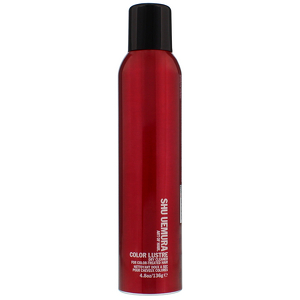
For the areas I anchor my hair or have it mostly up, I use a anti-damage lotion in that particular area on my hair when it’s wet right after washing.  That gives it a little more help against the future abuse that will incur.  Because we all know we aren’t always the nicest we could be to our lovely blonde locks!  12414671_0340_0340 I personally have been using Shu Uemura dual-chambered Ultimate Remedy.  It’s actually making a huge difference and I can tell my “anchor” area of my top-knot isn’t snapping or breaking as much :).


Another Reminder!!! 

Putting up wet hair in a tight bun or pony and leaving it up while it dries is super bad for your hair!  Especially if it is wet with sweat from working out!  The hair dries kinked where the anchor or hair tie is and will bend the cuticle while it dries which causes damage over time. 


Problem Three:

Bends in yer hair/kinks/hairband lines.

I actually just tried to take down my ponytail to snap a shot to use in this part of the post, but for the FIRST TIME EVER my ponytail lines actually looked cute and on purpose… Murphy’s Law.

Anyways, we all know what I’m talking about.  Besides the aesthetic offense, the real reason the kink or line is a problem is that I know you guys get lazy and flat iron them away!  Don’t lie!  I KNOW you do LOL!


Solution Three:

Shu Uemura Drycleaner Dry Shampoo.  And a blowdryer and round brush.

Yes, I’m bringing up Drycleaner dry shampoo again.  It is just SO good!

41fz86hpsnl-_ac_sl230_oribe-medium-boar-bristle-round-brush-one-size1166738

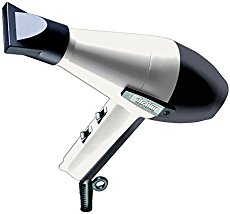
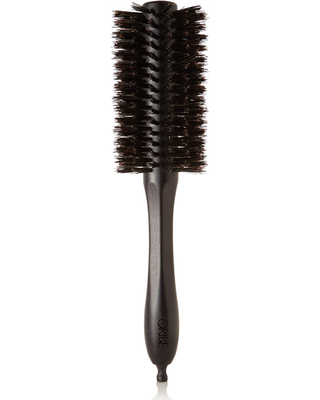
First, make sure all of your hair is dry, spray the Drycleaner lightly all over, but concentrate on the parts with lines or kinks from your hair being up.  Wait a few minutes, brush OUT the Drycleaner, and then use a round brush with a blow dryer (AND NOZZLE) to smooth out the kinks.

Yes. This is better for your hair than a flat iron!  Plus the conditioner in the Drycleaner will soften and make it much easier to get out the bump(s).  Your hair will thank you for not running a flat iron over your highlights.  It really will.


Okay Kiddos!

Any other questions about hair ties or how to tie up your hair nicely, feel free to mention them in the comments!  After all let be realistic: life requires putting your hair up.


XOXOX 

Caitlin With The Top-Knot ♥♥♥♥


8581 Santa Monica Blvd #305, West Hollywood, CA 90069


How To Speak And Understand “BLONDE”

As I’ve made all things blonde my civil duty to the world, I have comprised a list of terms used for you to better understand how you can ask for your dream blonde hair color. 

YAY! You’ve decided to go blonde, or think you may, or maybe you just have a thirst for knowledge when it comes to hair colors!

While I and the BLONDE/BLOND team applaud you; there’s going to be a bit of a situation when trying to explain yourself and your blonde interests and needs. 

Why, you ask? 

Because there’s a zillion different terms and works used to explain what you want and what color services will get you there!  And every salon and color line and colorist will have their own “lingo” when it comes to blonde. 

This is the first list of definitions, there will be more to follow.  This list is for hair color services.  Next will be names of colors themselves, and then one which explains how to use hairdresser terms to explain the look you want for your color.

fullsizerender-3

The BLONDE/BLOND List of Hair Color Service Terms and Their Definitions:

Highlights: can be in foils, paper, or painted on without either. This means the pieces of hair taken out and colored will be lighter than they are currently. Can be done on new regrowth or all over the entirety of the pieces of hair taken out for the highlight. 

Lowlights: the same as highlights but these pieces will be a darker shade than what they are currently. 

Base color: 

Hair color used to lighten your natural hair or to cover grey on your natural hair. This is usually used to describe painting the color only on regrowth you have. 

Balayage: 

The art of painting bleach on hair freehand without the use of paper or foils. This can range from a heavy balayage to create a super blonde look to smaller pieces taken out to create a natural sunkissed look. Fashion colors can be applied afterwards to give you a variety of rainbow hues! 

Base bump: 

Painting haircolor on hair after highlights or balayage is done to lift up your natural root color and also add in a different shade of blonde to the light pieces in your hair 

Smudge: 

See base bump 

Toner: 

A deposit only color that changes the tone of the current haircolor. 

Gloss: 

See toner; this can be a toner with pigment in it, or a clear gloss for shine and also used to fill lightened hair so it’s not as porous. 

Highlift color:

A color that has more lift than regular color. Can be used in highlights or balayage or even as a base color. Mostly used if natural hair is light, if your hair is darker it will result in an orange tone. In foils, it can bring up to ~4 levels of lift and is a great way to create multiple shades of blonde when used with bleach highlights. 

Bleach: 

Hair bleach that lifts pigment out but does not deposit any. 

Lightener: 

See hair bleach. It is a colorists term for bleach. 

Root shadow: 

Toner or base color used to create a depth around the first inch or more of your hair (from the scalp). Used in ombres sombres and general natural blonde “looks”. 

Color melt: 

Color taken from the root down (can be natural toned or fashion colors) and pulled over highlights or balayage to have a gradual color placed at the beginning of bright blonde ends. 

Ombré:

The gradualism of dark roots to light ends. Can be severe in nature, re: your ends can be several shades lighter than your roots. 

Sombré:

A less severe ombré; the portmanteau of “soft-ombré”. 

Microfoils:

Paper thin sections of hair put into foils that make it able to get within millimeters of the scalp.  Can be used to do any type of color, when used for highlights, they blend better than regular highlights. When used for all over blonde, they make it possible to get hard to lighten hair blonder than thicker foils.

Babylights:

Very thin and not obvious highlights that create a blended look.

I’m SURE there are things I’m forgetting! PLEASE comment and ask about anything you need defined!! 

XOXO

Caitlin and Team Blonde and Webster’s Dictionary

8581 Santa Monica Blvd #305, West Hollywood, CA 90069

Cheat Sheet!!!

As I’ve said before, great blondes think alike.

(This is, of course, assuming that you all think like me!)

So if you don’t like spending hours getting ready and work more than you know you should, and sleep less, every minute counts!  To help with the process, I’ve compiled a short list of “cheats” that will help save time and fool everyone into thinking you have your shit together. Yay!


Cheat One: Dry Shampoo

There are many out there; and I’ve written about some of them before, but recently I have gotten my greedy little hands on one that I think works the best.

Shu Uemura “Dry Cleaner” 

1166738

This is not only a dry shampoo, it also is a dry conditioner and your hair will feel so soft and also lay correctly just as if it was really clean after using it!  My hair even feels good the next day- no weird build up or waxy or powdery dry feeling.  Spray onto scalp area or really anywhere your hair feels dirty, wait 5 minutes, then brush out. It’s bomb AF.


Cheat Two: Malibu Packets

616lmrh93rl-_sy355_
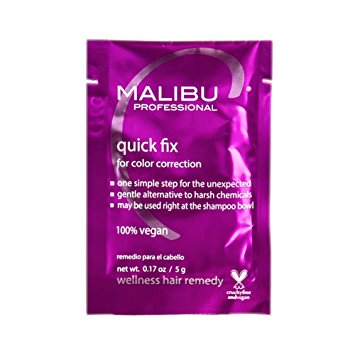
This is another item I have written about… They are used to get out deposits in your hair left by smog, product, and minerals/crap from water…even (GASP) build up from overusing purple shampoo!  (WHO THE HECK DOES THAT??? LOL)

These you can use when your color feels dull and you want to brighten up your blonde, but don’t have time to go into the salon.  Please note, however, that if you have corrective toner (your hair is brassy underneath a toner that was put on to combat that), or lowlights put in with hair color (not the ones that naturally occur when the pieces in-between your highlights are left out), these packets CAN take those out.  If your hair seems to be not as ashy after use, you can always use them and then use purple shampoo right after :).

Follow directions on the box! Also, I’ve noticed that they are cheaper on the malibu professional website than on amazon.


Cheat Three: Sebastian Cellophane 

OH hell yes. Shiny shiny hair.

These are from back in the DAY.  Like think “Heathers”.  “Heathers” was the “Mean Girls” of the late 80’s.  If you haven’t seen it, watch it and get ready to have a bunch of one-liners to use in multiple situations.  It’s almost as quotable as “Mean Girls”. (She doesn’t even GO HERE!!!!!)

2c29e8bdcd1fc2c33ebe3742f81f6cf7-500

This stuff is fantastic.  It’s a one step clear gloss that will truly make you feel so much better if your roots are getting a tad long or you feel like your hair is kind of matte.  I had a client who used this gloss at home and when she would go to film, her hair and makeup people would always ask her if she just got her color done the day after she used it.  No joke.

Important note: Do NOT get creative and get the colored cellophanes!  I know it seems like a good idea, but it’s not!!!!  If you want a colored cellophane, sorry kids, you need to go to your colorist.


Cheat Four: Straightforward Blow Dry Oil

Okay. For those of you who are better than us and insist on washing your hair and being so much more adult than the rest of us, here is a real time-saving product!

Made by the same hair geniuses that gave us Drycleaner dry shampoo, Shu has hit it out of the park with this one.

shu-uemura-straight-forward-time-saving-blow-dry-oil

When sprayed into wet hair, (before towel dried), you can literally see the water beading off the hair. It cuts dry time by 50% and smells amazing and also smooths and protects your hair while drying it.  We LOVE it at BLONDE/BLOND because it makes being able to see our finished product come much sooner, and you know we love to admire our own work LOL!


Okay thats it for now!  I did a study of how long blondes like to be told what to do and it seems that we lose interest after about how long this blog post is.


Here’s to sleeping in and having good hair regardless!!

XOXO

Caitlin 


8581 Santa Monica Blvd #305, West Hollywood, CA 90069